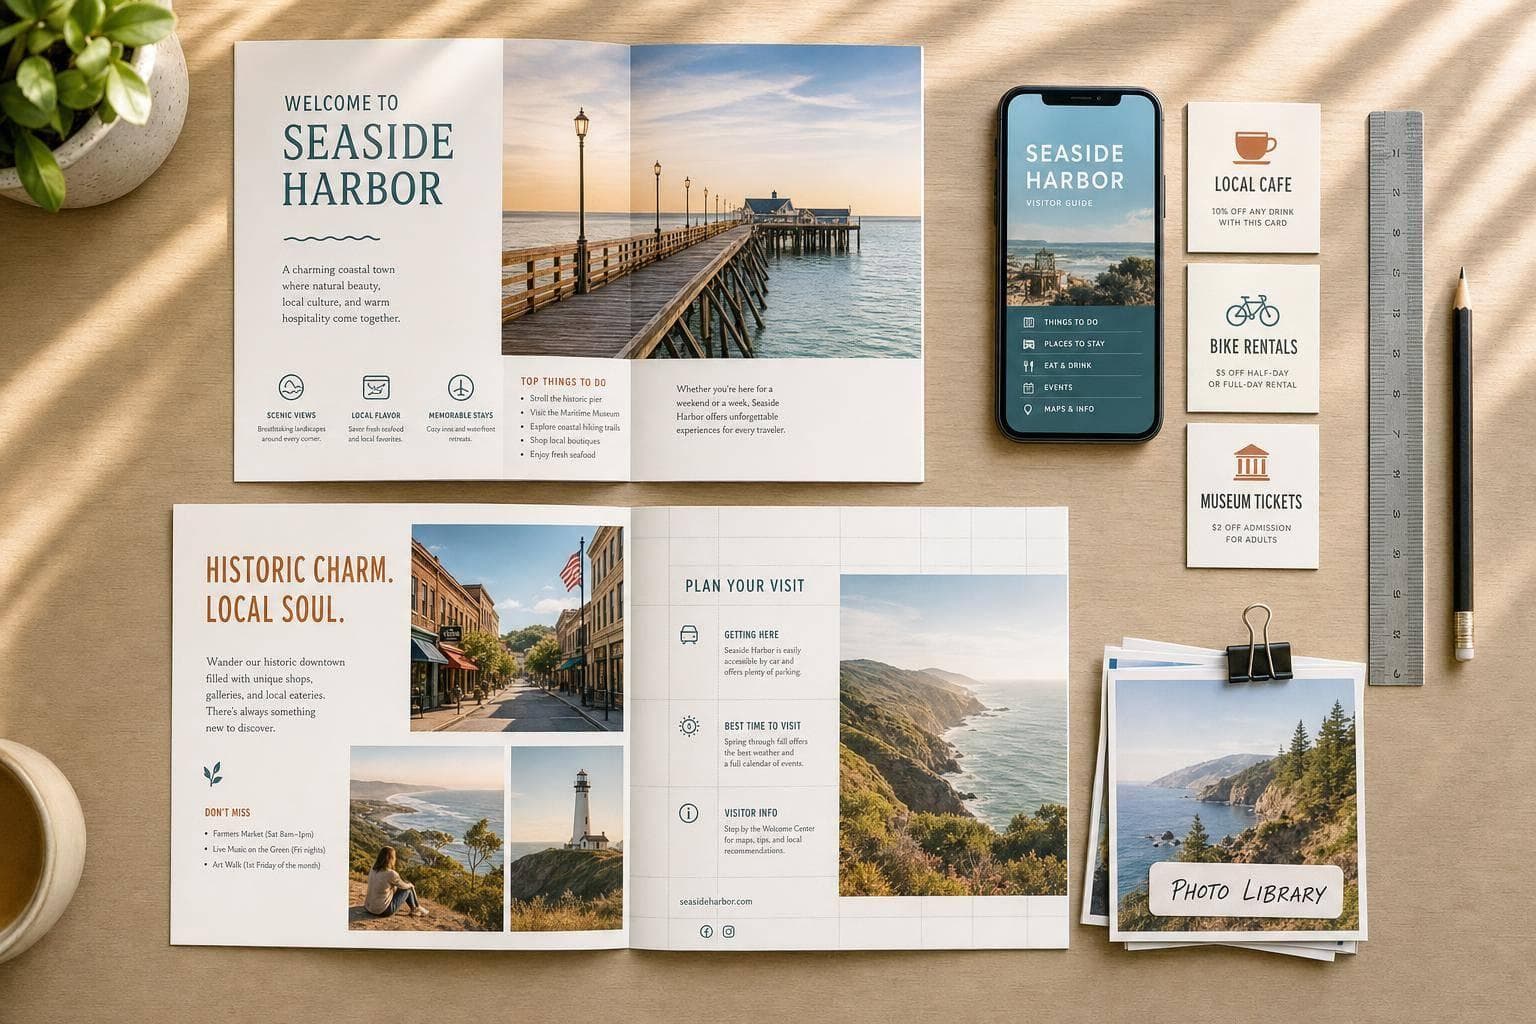
How to Create a Visitor Guide on a Small Budget
You do not need a big budget to make a visitor guide that people use. If I were doing this on a tight budget, I’d keep the guide focused, reuse what I already have, limit design choices, match print volume to distribution, and use ads plus a digital version to help cover costs.
Here’s the short version:
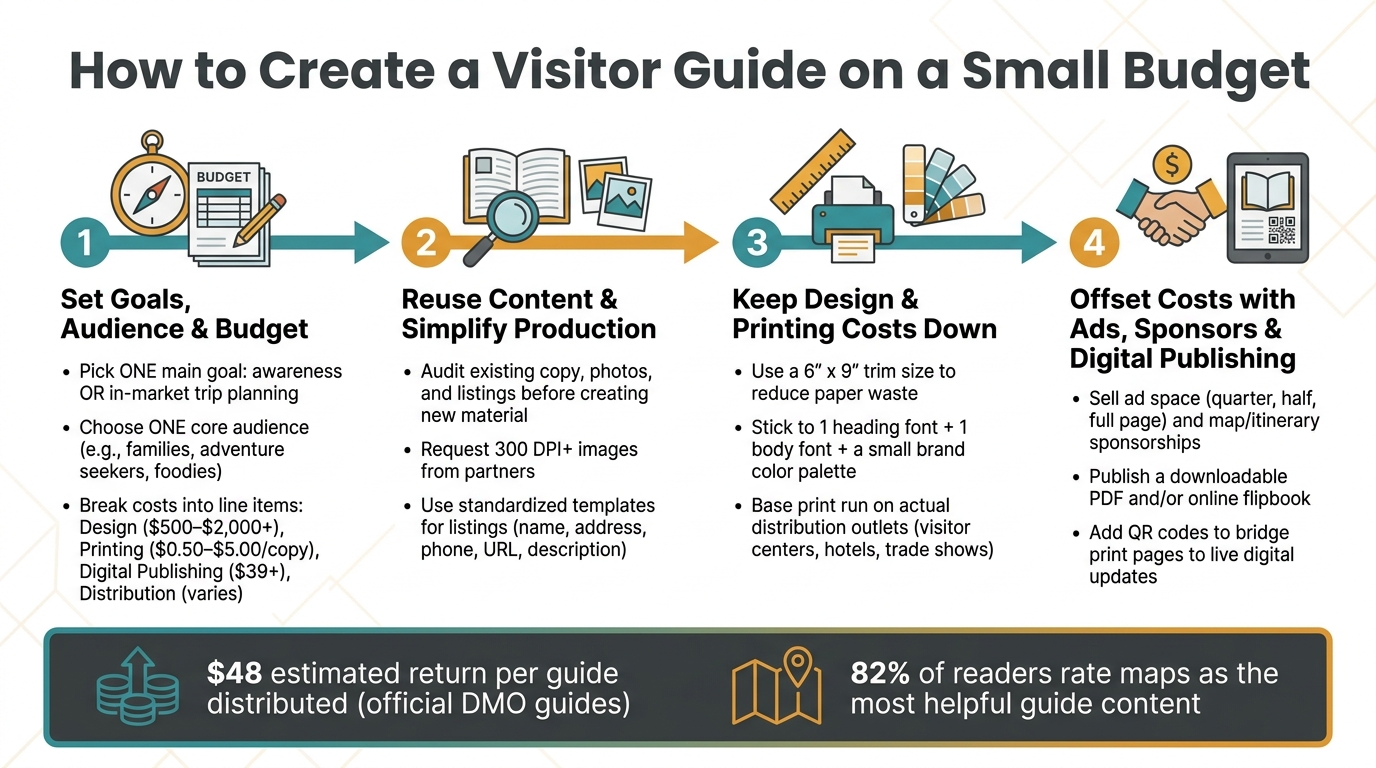
- Pick one main goal for the guide, not several
- Choose one core audience and build sections around their needs
- Set line-item costs for writing, photos, design, print, shipping, and digital
- Reuse old copy, listings, and photos before making new material
- Use fixed templates for listings, features, and ads
- Keep print specs simple with a small trim size and standard layouts
- Print only what you can distribute
- Sell ad space and sponsorships to offset production costs
- Publish a PDF or flipbook so people can read and share it online
- Add QR codes to connect print pages to live links and updates
A few numbers stand out. Official destination guides can return about $48 per guide distributed, and 82% of readers rate maps as one of the most helpful parts. That tells me two things: print can still pay off, and some pages matter more than others.
My takeaway: keep the guide tight, keep the process standard, and let print and digital work together.
| Area | What I’d do on a small budget |
|---|---|
| Goal | Focus on one job: awareness or in-market trip planning |
| Content | Reuse existing assets first |
| Design | Use templates, fixed ad sizes, and a short color palette |
| Printing | Order based on actual outlets, not guesswork |
| Revenue | Sell ads, map sponsorships, and premium placements |
| Digital | Offer a PDF, flipbook, and QR-linked updates |
If I stayed disciplined on those points, I could put out a polished guide without overspending.
How to Create a Visitor Guide on a Small Budget: 4-Step Process
1. Set goals, audience, and a realistic budget
Start by locking in three things: purpose, audience, and budget. Everything else should come from those choices.
Define what the guide needs to do
A visitor guide can do a few different jobs. But if you want to keep costs under control, pick one main goal and let that shape the project. That choice affects page count, how much detail you need, and how you plan to distribute the guide.
A useful way to think about it is this: is the guide for awareness, meaning it reaches people before they arrive, or for on-site trip planning, meaning it helps visitors who are already there? Those goals need different types of content and different amounts of it.
An evergreen guide should stay centered on timeless stories and major attractions, not details tied to specific dates.
Choose your audience and must-have sections
Once the purpose is set, get clear on who the guide is for. Adventure seekers, food lovers, and families don't look for the same things. So it makes sense to focus on the group most likely to use the guide and build sections around the questions that group will ask.
Maps and short feature stories should come first. Directory-style listings have less impact on their own. Standard categories like "Eat, Stay, Play" work well because they match how travelers already think. That helps keep pages tight and useful, instead of filling space with low-use content.
Build a lean budget with clear line items
Break the project into the main cost buckets: copywriting, photography, design, printing, shipping, and digital publishing. Then split those into core costs and optional add-ons like premium paper finishes, specialty UV coats, or extra pages.
That split matters. If money gets tight, decision-makers can cut the extras without tearing apart the base guide. These line items also set the upper limit for design, print, and digital spend.
| Expense Category | Estimated Cost (USD) | Budget-Saving Strategy |
|---|---|---|
| Design | $500 – $2,000+ | Use Canva or template-based layouts |
| Printing | $0.50 – $5.00 per copy | Match quantities to your planned distribution |
| Digital Publishing | $39+ | Use a simple downloadable PDF or low-cost flipbook |
| Distribution | Varies | Use QR codes and digital links to reduce physical shipping |
One practical rule: don't sign a printing contract until ad sales are finalized and the page count is locked. If you lock things in too early, you can end up paying penalties or sitting on unused pages. Build that timing into the budget before you commit to print.
Once those choices are in place, reuse existing content to keep production lean.
sbb-itb-909066b
2. Reuse content and simplify production
Repurpose existing copy, listings, and photos
Before you make anything new, check what you already have.
Go through website copy, old guide text, newsletter blurbs, and approved photos first. Past member listings and directory data often still work with only small updates. That kind of quick review helps you sort content into three buckets: what’s still right, what needs permission, and what should be updated for the current guide.
A lot of chambers and CVBs already have solid images tucked away in campaign archives. So don’t start from zero if you don’t have to. If you do have gaps, ask partner businesses and local attractions to send high-resolution images at 300 DPI or higher for print, along with short descriptions. Social media posts can also help fill visual gaps, but only if you get permission before using any image in print.
Send every asset to one intake email and assign one owner to manage it. Start with what you already own, then fill in the missing pieces.
Use short templates for features and listings
Short, standardized templates save time fast.
When every listing uses the same structure - business name, address, phone number, website, and a short description - editing and fact-checking get a lot easier. The same idea works for feature pages too. Use repeatable layouts for itineraries, top-5 lists, themed trails, and maps so each new issue can be updated without reworking page design from scratch.
A little consistency goes a long way here. Standardize phone numbers, addresses, and URLs. That makes proofreading faster and helps keep layouts clean and tight.
Once your content follows a set format, design and print planning usually get cheaper and faster too. With standardized content, it’s much easier to cut design time and control print costs.
3. Keep design and printing costs down
Use templated layouts and a limited design style
Once the content is locked in, layout gets a lot easier and less expensive.
A smaller trim size, like 6" x 9", can help printers place more guides on each press sheet. That cuts paper waste and lowers cost.
Keep the design system simple too. Use one typeface for headings and one for body text. Stick to a small color palette based on your brand colors plus one or two neutrals. Use the same page grid from start to finish, and keep ad sizes fixed - quarter page, half page, and full page - so you’re not rebuilding pages every time. With a setup like that, a staff designer using Canva, Figma, or Google Slides can put together a clean layout fast.
| Layout Approach | Design Time | Printing Cost | Best Use Case |
|---|---|---|---|
| Fully Custom | Very High (Weeks) | High (Custom setup) | Large DMOs with high budgets |
| Templated (Canva/Figma) | Low (Days) | Standard | Small-to-mid chambers on a budget |
| Standardized Grid | Medium | Low (Efficient forms) | Guides with heavy ad listings |
Don’t crowd the page. White space helps the guide feel easier to read, and a fixed layout makes ad sales and later updates far less of a headache.
Match print quantities and materials to your distribution plan
Print quantity is where small budgets often drift off course. The fix is pretty simple: base your run on actual distribution points, not on a nice round number.
Start with your likely outlets. That usually includes visitor center foot traffic, hotel lobbies, trade shows, and relocation packets. Add those numbers up, then use that total to shape your order. Your printer can also help you get more guides per press sheet and cut waste.
For paper and finish, ask for physical samples before you commit. Finishes like dull UV, soft UV, or satin can change how images look and how the guide feels in someone’s hand. Cover stock matters too. If the guide falls apart halfway through a trip, it’s not doing much good.
| Print Strategy | Up-front Cost | Storage Needs | Update Flexibility | Best Use Case |
|---|---|---|---|---|
| Large Offset Run | High | High | Low (Static) | Evergreen guides for high-traffic centers |
| Staggered Reprints | Medium | Low | High | Destinations with seasonal changes |
| Digital Print-on-Demand | Low | None | Very High | Niche guides or small test markets |
Before you place the order, use the final page count to confirm the trim size, paper stock, finish, and run size. Once those print specs are locked, pricing ads and building the digital version becomes much simpler.
4. Offset costs with ads, sponsors, and digital publishing
Once your print plan is locked in, ad sales and a digital edition can help pay for it without adding more pages.
Build simple advertiser and sponsor packages
Turn your reserved ad space into plain, easy-to-read rate cards and sponsorship tiers. In addition to display ads, sell sponsorships for high-value placements like the maps section, itinerary pages, or the front cover. Digital ads can link straight to an advertiser's website, which gives them a direct path to traffic and makes sponsorship deals easier to pitch.
You can also offer a few simple add-ons, such as:
- featured placements
- digital exposure
- bulk guide orders
Placement matters more than many people think. A restaurant ad next to a walking tour feature can feel like a useful tip instead of a hard sell. And since maps are rated as the most helpful content by 82% of readers, a map sponsorship often makes a lot of sense.
Publish a digital version that is easy to update and share
A digital version helps the guide reach people beyond racks, counters, and hotel lobbies. It also gives your team a simple way to keep content current.
The two most useful formats are a downloadable PDF and an online flipbook. PDFs can be exported from your current layout files and shared through email, social media, or a website link. Flipbooks add page-turn navigation and clickable links.
Some teams also publish a mobile-friendly web version so the guide can stay current and support trip planning. Print is fixed once it goes out the door. Digital publishing gives you data on which pages get the most attention and which advertiser links people click. Interactive maps with clickable pins and itinerary-building features can also make the guide easier to use.
QR codes on printed pages are a simple bridge between print and digital. They can send readers to live event calendars, trail maps, booking engines, or other updated resources while keeping the print guide clean and uncluttered.
The table below shows how print-only, digital-only, and blended strategies compare when money is tight:
| Strategy | Cost | Reach | Update Speed | Engagement |
|---|---|---|---|---|
| Print-Only | High (printing/postage) | Physical/in-market only | Slow (requires reprint) | Tactile, high recall |
| Digital-Only | Low (hosting/platform fees) | Global, search-driven | Instant | Interactive, trackable |
| Blended (Print + Digital) | Moderate | Multi-channel | High (live links via QR) | Action-oriented (booking, sharing) |
Use print for visibility, and use digital for updates, clicks, and live links.
Conclusion: Stay focused on the basics, standardize the work, and extend your reach
A small budget can still produce a strong visitor guide if the purpose, audience, and production process are clear.
That starts with keeping the content evergreen, using standard sections, and planning reuse from day one. If the guide stays evergreen, it can work across multiple seasons without constant edits.
Stick with familiar sections like Eat, Stay, and Play. And put one person in charge of gathering content so the workflow stays steady and repeatable.
A repeatable process also gives staff more time for ad sales and partner relationships instead of chasing last-minute edits.
Then connect print and digital in a practical way. Use a sensible print run, add a digital version, and place QR codes where they help bridge the two. Official DMO guides generate an estimated $48 return for every guide distributed. Keep the guide tight, repeat what works, and make print and digital support each other.
FAQs
How many pages should a small-budget visitor guide have?
There’s no fixed page count for a visitor guide. The right length depends on what you need to include, your budget, and how many ads you plan to sell.
Some programs go with a concise 16-page format that covers key experiences and itineraries, then add ad pages as needed. It’s smart to lock in your final page count only after ad sales are confirmed and the project scope is clear, before you commit to print.
What should I cut first if my budget gets tighter?
First, cut back on printed materials and move more of your content to digital formats. Printing and distribution are often the biggest costs, and they’re hit harder when paper prices go up.
Put the PDFs and other digital assets you already have to work. Digital publishing makes it easier to update content fast, skip reprint costs, and track engagement so you can show clear results to stakeholders.
How do I choose between print-only and print plus digital?
It depends on what you want most: reach, engagement, or budget.
Print tends to create stronger emotional engagement and usually stays in front of people longer. That makes it a solid hands-on tool for discovery, especially when you want something readers can pick up, keep, and come back to.
Digital, on the other hand, gives you measurable reader data and makes live updates much easier and less expensive. You can change links, refresh offers, and adjust seasonal details without reprinting anything.
In many cases, a hybrid approach works best. Print sparks interest, while digital handles trackable links, booking, and seasonal updates.